Training MXNet — part 4: distributed training
In part 3, we worked with the CIFAR-10 data set and learned how to tweak optimisation parameters. We ended up training a 110-layer ResNext model using all 4 GPUs of a g2.8xlarge instance… which took about 12 hours.
In this article, I’ll show you how to use multiple instances to dramatically speed up training. Buckle up!
Creating the master node
We’re going to work with p2.8xlarge instances running the Deep Learning AMI, Ubuntu edition. However, you can easily replicate this with any kind of EC2 instance or even on a bunch of PCs running under your desk :)
Let’s get started. We’re going to configure the master node the way we like it and then we’ll clone it to add more instances to our MXNet cluster. The first step is to go to the Marketplace section of the EC2 console and locate the Deep Learning AMI.
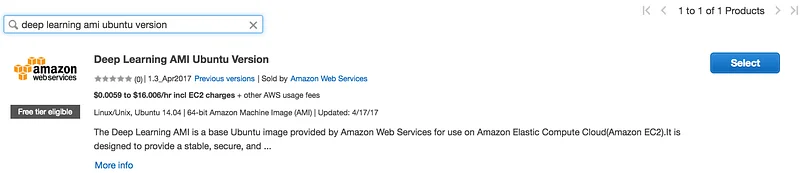
Then, select the instance type you’d like to use. Please be mindful of instance costs: a p2.8xlarge is going to cost $7.20 per hour. Don’t worry, you can actually use any instance type, as MXNet is able to use either the CPU(s) or the GPU(s) of the instance. Obviously, GPU instances will be much faster than t2.micros :)
A few more clicks and you’re done. Just make sure the SSH port is open and that you have created a new key pair for the instance (let’s call it ec2). After a few minutes, you can ssh into the master node using the ubuntu user (not the ec2-user).
Enabling distributed training in MXNET
By default, distributed training is not enabled in the source distribution, which means we probably have to rebuild MXNet from source. If your build already includes distributed training, you can skip this section.
The Deep Learning AMI includes the MXNet sources: we just have to make them our own and refresh them to the latest stable version (0.9.5 at the time of writing).
Then, we need to configure our build options. The last one actually enables distributed training.
Now we can build and install the library. No need to add dependencies, as they’re already included in the AMI. I’m running a parallel make on 32 cores because that’s what a p2.8xlarge has.
Once the library is installed, it’s a good idea to run a quick Python check.
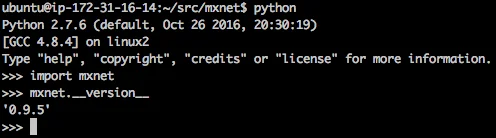
Ok, this looks good. Let’s move on.
Opening ports for distributed training
The master node and the worker nodes need to talk to one another to share the data set as well as training results. Thus, we need to alter the configuration of our security group to allow this.
The absolute simplest way to do this is to allow all TCP communication between instances of the MXNet cluster, i.e. instances using the same security group.
To do this, go to the EC2 console and edit the inbound rules of the security group of the master node. Add a rule allowing all TCP traffic and use the actual name of the security group to restrict source traffic.

Our instance is now ready. Let’s create the worker nodes.
Creating the worker nodes
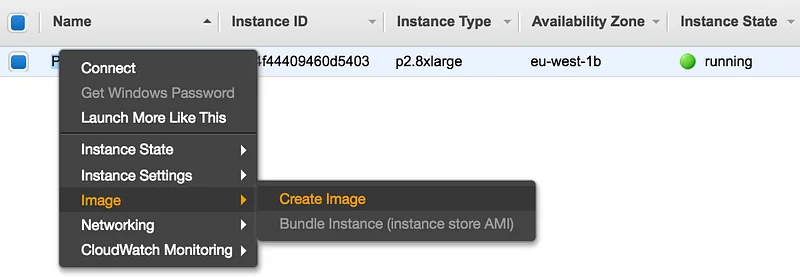
We’re going to create a new AMI based on the master node. Then, we’ll use it to launch the workers. Locate your instance in the EC2 console and create an image.
After a few minutes, you’ll see the new AMI in the “Images” section of the EC2 console. You can now use it to launch your worker nodes.
Nothing complicated here: select the instance type, the number of instances you’d like to launch (3 in my case) and the same security group as the master node.
A few more minutes and your instances are ready.
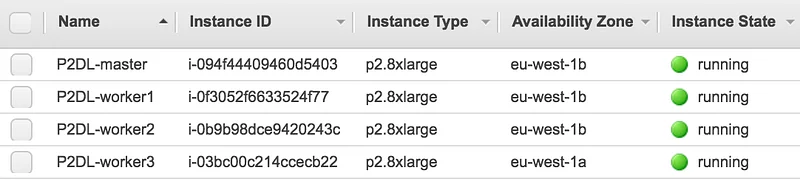
Lovely. Write down the private IP adresses of each instance, we’re going to need them in a second.
Configuring the cluster
Let’s log in to the master node, move to the tools directory and look at the launcher.

This is the tool we’ll use to start training on all nodes (master node included). It does two things:
- using rsync, copy the data set in /tmp/mxnet on each node. Alternatively, we could avoid this by sharing the data set across the nodes with home-made NFS or Amazon EFS.
- using ssh, run the python script that starts training. As you can see, other protocols are available, but we won’t look at them today.
Creating the hosts file
launch.py needs the private IP address of all nodes (including the master node) to be declared in a file. It should look something like this.

Configuring SSH
We need password-less ssh access between the master node and the worker nodes. If you already have this in place, you can skip this section.
We’ll keep things simple by creating a new key pair on our local computer and distributing it across the cluster.
PLEASE do not reuse the ec2 key pair, it’s bad practice. Also, some of you may be tempted to bake the key pair in the AMI to avoid distributing it to all instances, but I would recommend against doing that since it means storing the private key on all nodes instead of just the master node. And ssh agent forwarding isn’t great either.
Next, still from our local computer, we’re going to copy the public key to all nodes (including the master node) and the private key to the master node only.
Finally, on the master node, we’ll start ssh-agent and add the mxnet identity.
You should now be able to log in from the master node to each worker node (including the master node itself). Please make sure that this is working properly before going on.
If it does, you’re ready to train, buddy :)
Launching distributed training
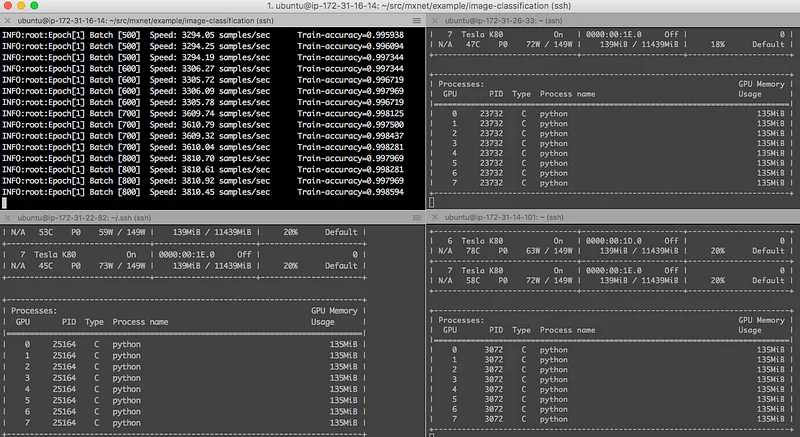
Here’s the magic command: 4 nodes listed in the hosts file will receive a copy of the data set in /tmp/mxnet via rsync. Then, the master node will run the train_cifar10.py script on each node, training a 110-layer ResNext model on all 8 GPUs.
If you’re running on CPU instances, just remove the gpus parameters.
The PS_VERBOSE variable will output extra information. Very useful in case something goes wrong ;)
You can check progress by logging in on the different nodes and running the ‘nvidia-smi -l’ command.
So how fast is this? As I mentioned before, it took about 12 hours to run 300 epochs on the 4 GPUs of a g2.8xlarge instance. The combined 32 GPUs of the 4 p2.8xlarge instances did it in 91 minutes!
That’s an 8x speedup, which kind of makes sense since we have 8x more GPUs. I had read about it and now I see it with my own eyes: linear scaling indeed! This makes me want to push it to 256 GPUs: it would only require 16 p2.16xlarge after all :D
Last but not least, my colleagues Naveen Swamy and Joseph Spisak wrote a very interesting blog post on how to automate most of this stuff using AWS CloudFormation. This is definitely worth reading if you’re running everything in AWS.
That’s it for today. Thank you very much for reading and for all the friendly support I’ve been receiving lately. It means a lot to me!