Johnny Pi, I am your father — part 5: adding MXNet for local image classification
In the previous post, we learned how to use Amazon Rekognition to let our robot detect faces and labels in pictures taken with its own camera. This is a very cool feature, but could we do the same thing with local resources only, i.e. without relying on a network connection and a cloud-based API?
Or course we can. In this post, I’ll show you how to classify images using a local Deep Learning model. We’ll use the Apache MXNet library, which I’ve covered extensively in another series. Let’s get to work.
Sending commands
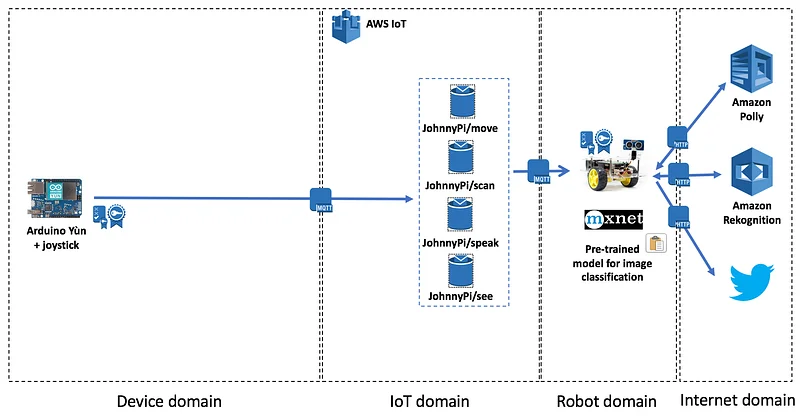
We’re going to use the same MQTT topic as for Rekognition, namely JohnnyPi/see: we’ll just add an extra word to specify whether Rekognition or MXNet should be used.
Since we’re not invoking any additional AWS API, there is no additional IAM setup required (and there was much rejoicing!).
Installing Apache MXNet on the Raspberry Pi.
We have two options: build from source (as explained in this post) or install directly with pip. Let’s go for the second option, which is obviously easier and faster.
If you’re interested in building from source, here are the instructions.
Picking a Deep Learning model for image classification
Now what about the model? Given the limited processing power and storage capabilities of the Pi, it’s obvious we’re never be able to train a model with it. Fortunately, we can pick pre-trained models from MXNet’s model zoo. As we found earlier, we need a model that is small enough to fit in the Pi’s memory (only 1GB). Inception v3 is such a model.
Published in December 2015, Inception v3 is an evolution of the GoogleNet model (which won the 2014 ImageNet challenge). Inception v3 is 15–25% more accurate than the best models available at the time, while being six times cheaper computationally and using at least five times less parameters (i.e. less RAM is required to use the model).
Our version of Inception v3 has been pre-trained on the ImageNet dataset, which holds over 1.2 million pictures of animals and objects classified in 1,000 categories. Let’s fetch it from the model zoo.
OK, now it’s time to write some code!
Code overview
With MXNet added into the mix, here’s what should now happen when we send an MQTT message to the JohnnyPi/see topic.
First, we’ll take a picture with the Pi camera. If the message starts with ‘reko’, we’ll use Rekognition just like we did in the previous post. No changes here.
If the message starts with ‘mxnet’, then we will:
- load the image and convert it in a format than can be fed to the MXNet model,
- use the model the predict the categories for this image,
- extract the 5 most likely categories (aka ‘top 5’),
- build a text message with the top 1 category and use Polly to play it,
- if the message ends with ‘tweet’, send a tweet containing both the image and the message.
This is what the updated callback looks like.
As usual, you’ll find the full code on Github.
Loading and classifying the image
I’ve already covered these exact steps in full detail in a previous post, so I’ll stick to a quick summary here.
In inception.load_image(), we use OpenCV and Numpy to load the image and transform it a 4-dimension array corresponding to the input layer on the Inception v3 model: (1L, 3L, 224L, 224L) : one sample with three 224x244 images (red, green and blue).
In inception.predict(), we forward the sample through the model and receive a vector of 1,000 probabilities, one for each class.
In inception.get_top_categories(), we sort these probabilities and find the top 5 classes.
Speaking and tweeting
This part is almost identical to what we did with Rekognition, so no need to repeat ourselves.
Testing
Once again, we’ll use MQTT.fx to send commands to the JohnnyPi/see topic:
- two for Rekognition: ‘reko’ and ‘reko tweet’). We’ve already tested Rekognition in the previous post, so let’s skip these here.
- two for MXNet: ‘mxnet’ and ‘mxnet tweet’.
Let’s try a first object.
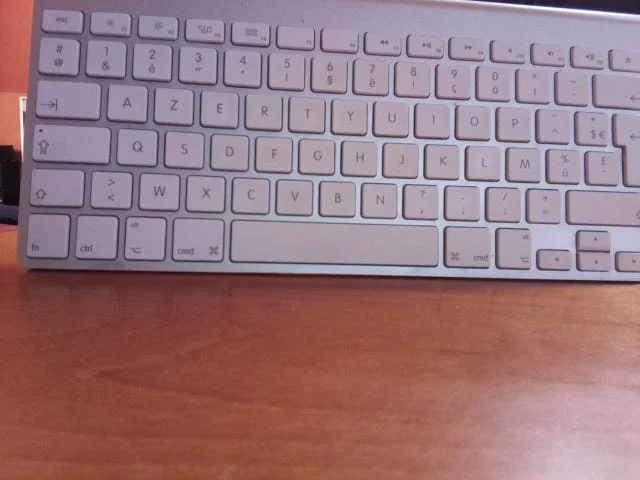
The output is:
Topic=JohnnyPi/see
Message=mxnet
forward pass in 3.14714694023
probability=0.467848, class=n03085013 computer keyboard, keypad
probability=0.156991, class=n04152593 screen, CRT screen
probability=0.090207, class=n03782006 monitor
probability=0.079132, class=n03793489 mouse, computer mouse
probability=0.048446, class=n03642806 laptop, laptop computer
[(0.46784759, 'n03085013 computer keyboard, keypad'), (0.15699127, 'n04152593 screen, CRT screen'), (0.090206854, 'n03782006 monitor'), (0.079132304, 'n03793489 mouse, computer mouse'), (0.0484455, 'n03642806 laptop, laptop computer')]
I'm 46% sure that this is a computer keyboard, keypad.
Let’s try another one.
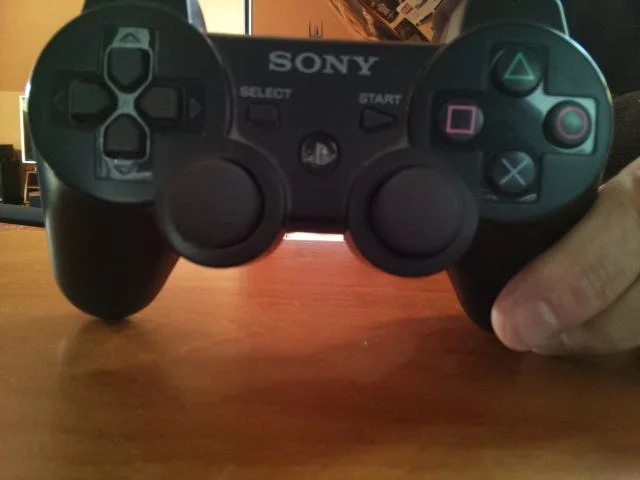
The output is:
Topic=JohnnyPi/see
Message=mxnet
forward pass in 3.1429579258
probability=0.511771, class=n03602883 joystick
probability=0.185790, class=n03584254 iPod
probability=0.099805, class=n03691459 loudspeaker, speaker, speaker unit, loudspeaker system, speaker system
probability=0.022552, class=n04074963 remote control, remote
probability=0.017473, class=n03891332 parking meter
[(0.5117712, 'n03602883 joystick'), (0.18578961, 'n03584254 iPod'), (0.09980496, 'n03691459 loudspeaker, speaker, speaker unit, loudspeaker system, speaker system'), (0.022552039, 'n04074963 remote control, remote'), (0.017472528, 'n03891332 parking meter')]
I'm 51% sure that this is a joystick.
And let’s tweet a last one:
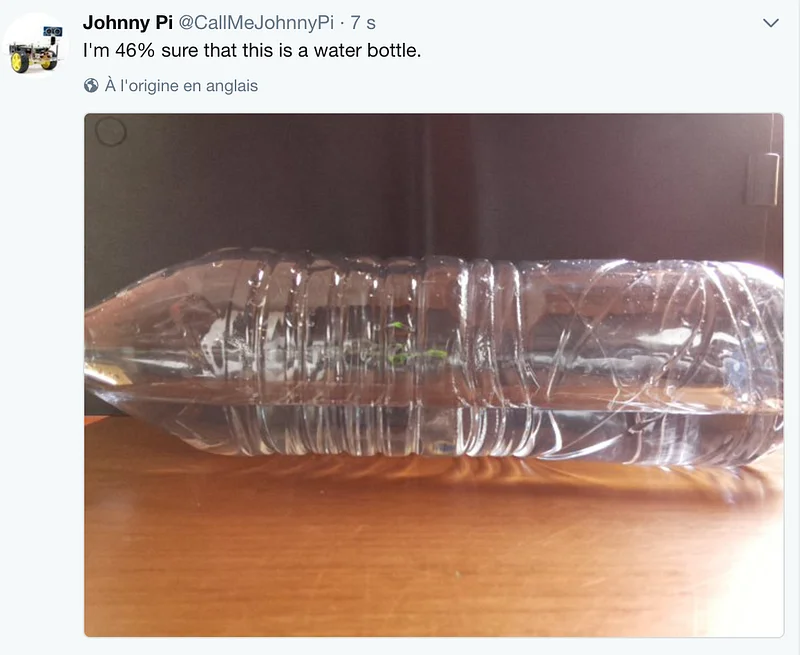
The output is indeed:
Topic=JohnnyPi/see
Message=mxnet tweet
forward pass in 3.00172805786
probability=0.460716, class=n04557648 water bottle
probability=0.098160, class=n01990800 isopod
probability=0.079460, class=n04116512 rubber eraser, rubber
probability=0.055721, class=n04286575 spotlight, spot
probability=0.032628, class=n02823750 beer glass
[(0.46071553, 'n04557648 water bottle'), (0.098159559, 'n01990800 isopod'), (0.079459898, 'n04116512 rubber eraser, rubber, pencil eraser'), (0.055721201, 'n04286575 spotlight, spot'), (0.03262835, 'n02823750 beer glass')]
I'm 46% sure that this is a water bottle.
What’s next
Our robot is now able to move, measure distance to objects, detect faces and classify objects. In the next part, I’ll show you how to use an IoT button to send commands to the robot. Once this this complete, we’ll move on to building an Amazon Echo skill for voice control. Stay tuned :)
As always, thanks for reading.
Part 0: a sneak preview
Part 1: moving around
Part 2: the joystick
Part 3: cloud-based speech
Part 4: cloud-based vision
This article was written while listening to Pink Floyd’s “Dark Side of the Moon”, which is pretty much the only thing that my jet-lagged brain can take right now :)